
Building a Raspberry Pi Kubernetes Cluster
Pis together strong.
Part 2: Kubernetes Infrastructure
Motivation
One my favorite experiences during undergrad was working on a university big data cluster running apache spark and hdfs. I decided to build my own cluster using raspberry pis in order to get more hands on experience with distributed computing, containerization, and devops.
My intention is that this little pi cluster serve as a mini homelab and learning environment.
I’d like to:
- Play with Kubernetes
- Host TBD personal projects
- Continue to learn about linux & devops
- Examine the feasibility (or perhaps advisability?) of self hosting Apache Spark
The following is part guide, part personal brain dump. I relied heavily on documentation provided by existing pi cluster projects, I’d highly recommend checking them out first and foremost!
Building a raspberry pi hadoop spark cluster
How to build a Raspberry Pi Kubernetes Cluster with k3s
Creating an Apache Spark Cluster with Raspberry Pi Workers
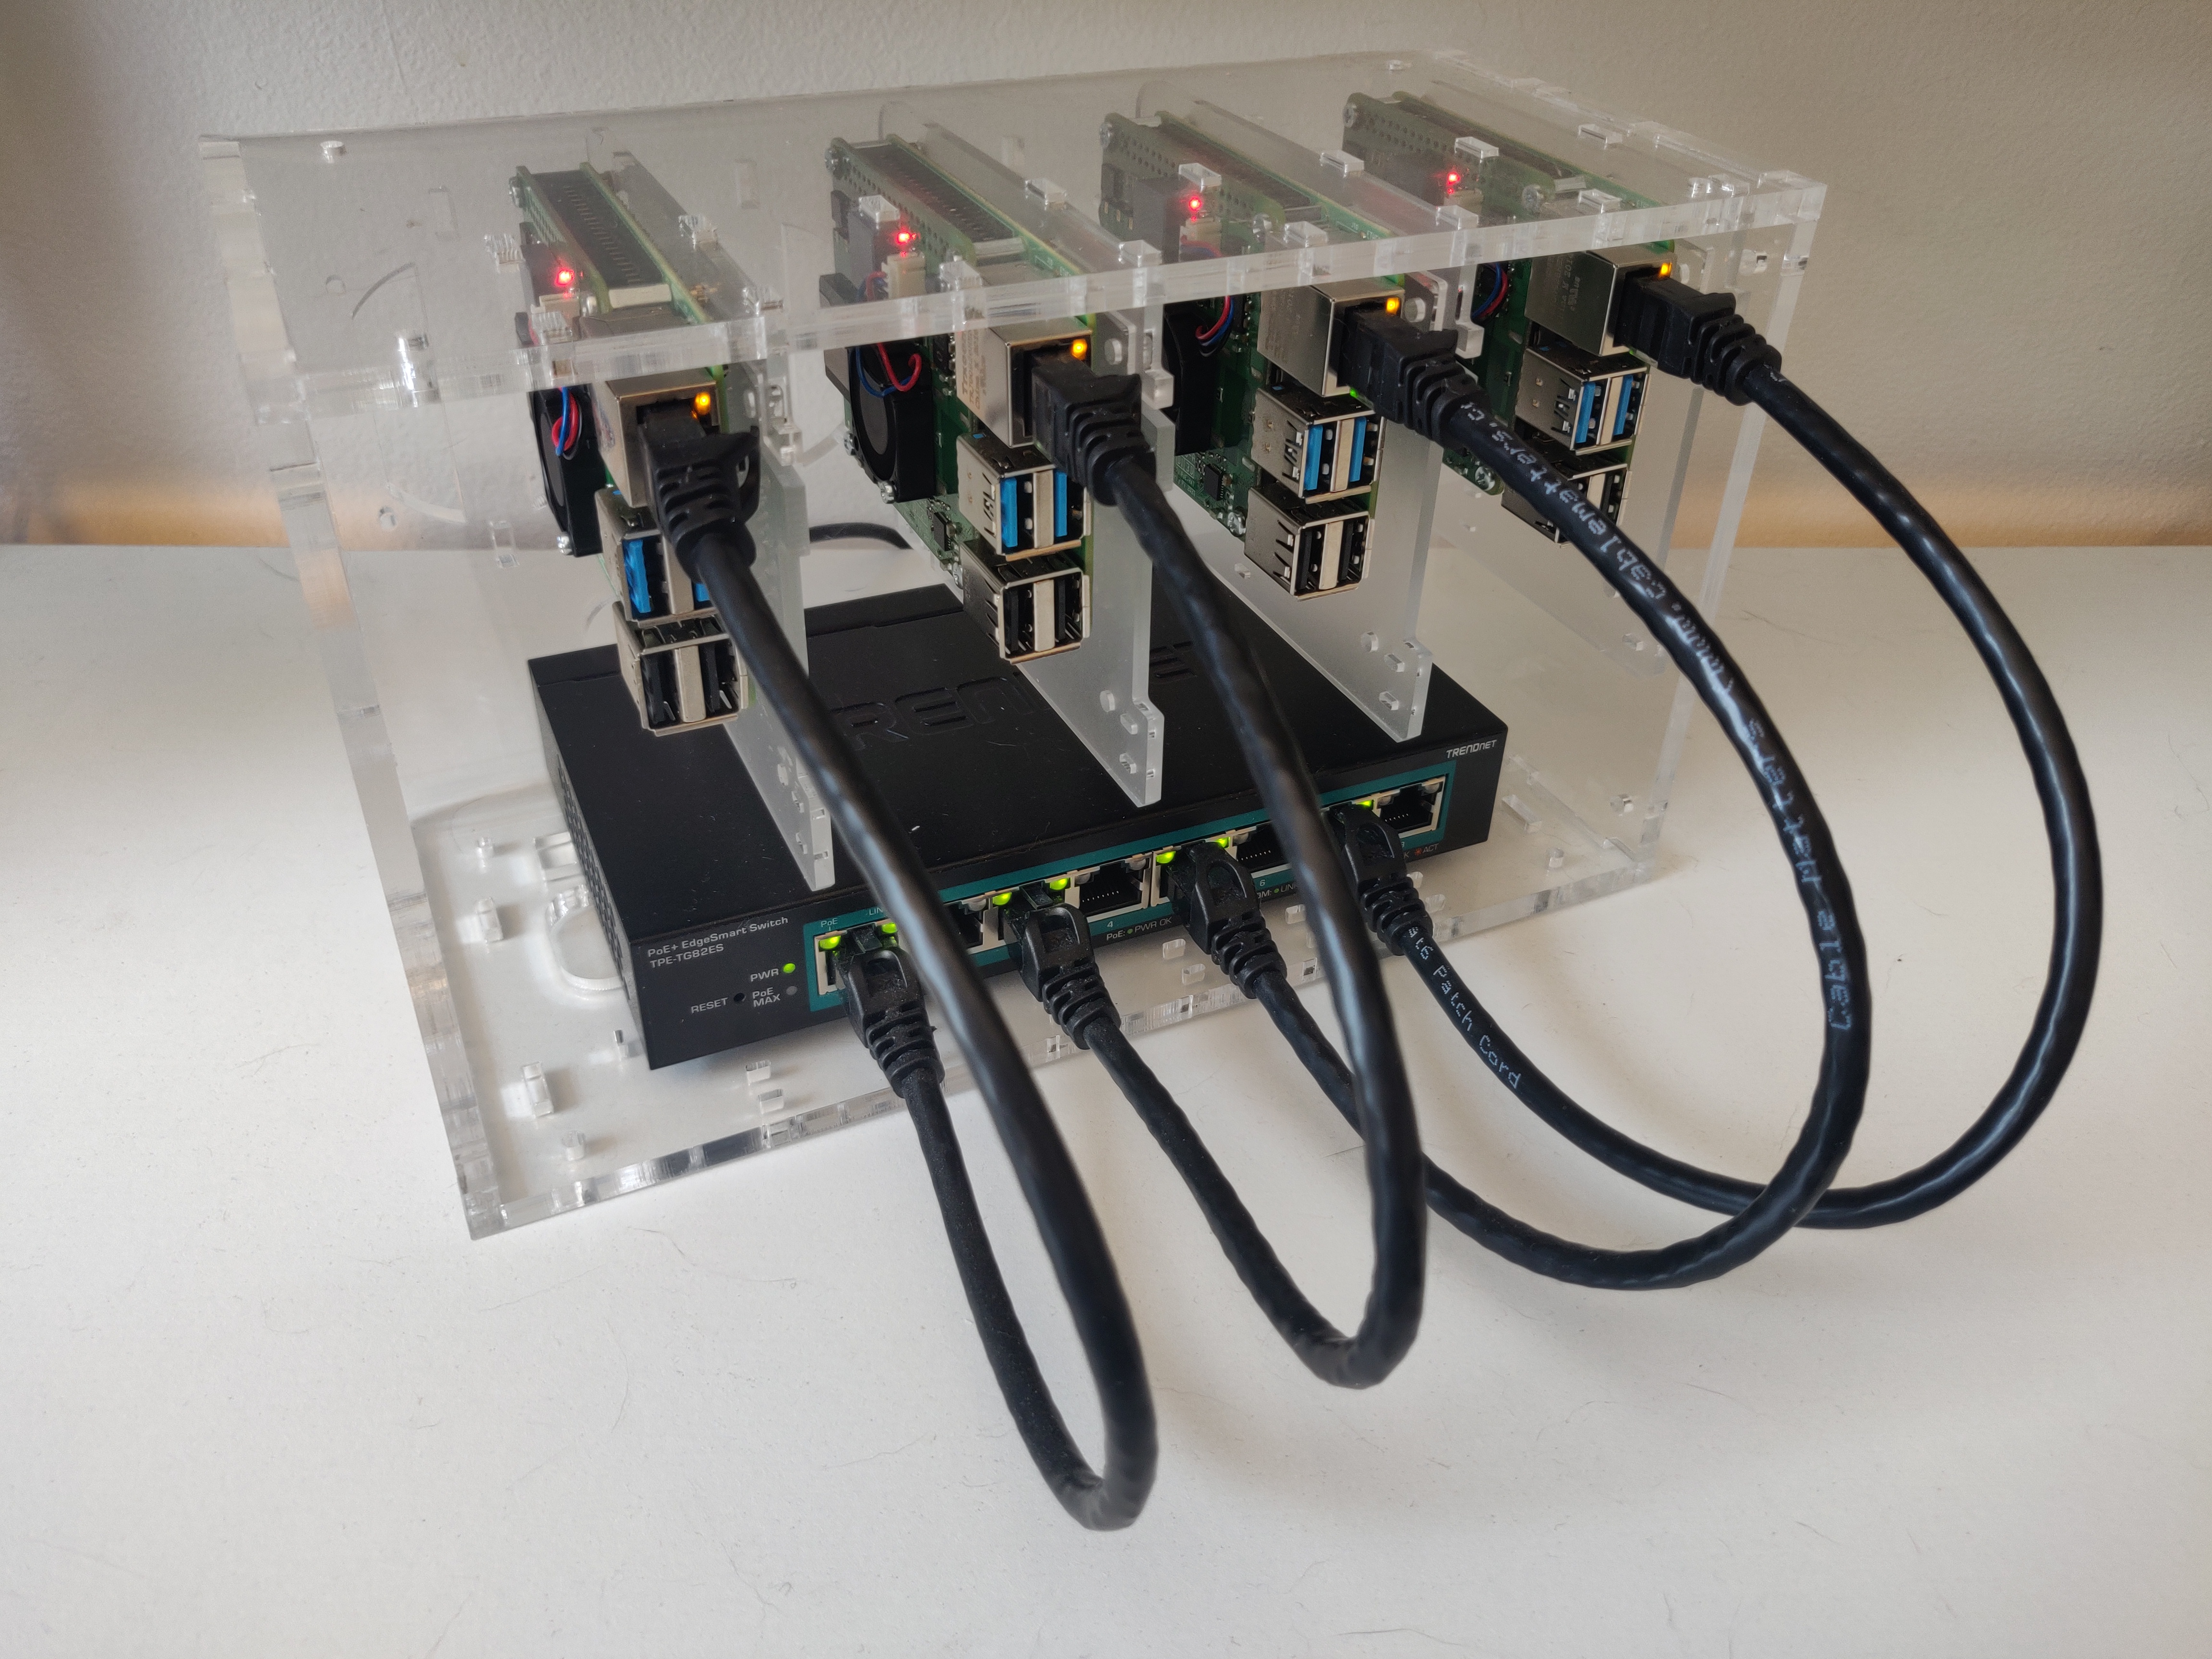
Supplies
- 4x Raspberry Pi 4
- 4x Pi POE Hats
- POE Switch
- Case
- 4x Micro SD cards (256gb)
- 4x Ethernet Cables
I was lucky enough to purchase my 8gb Pi 4s before they became out of stock pretty much everywhere online. The pi is widely documented, price performant, and specifically optimized for the 64bit Raspberry Pi OS.
Going with POE allows the cluster to be sleek and portable. The poe swtich provides our power source (only one power cable needed!) and isolated networking for the cluster.
The 256gb sd cards should allow enough distributed storage to effectively emulate big data computations.
Setup
We’ll skip over physically setting up the cluster. Get everything screwed in and plugged in the case.
For our operating system we are using raspberry pi os. Download the lite version, we don’t need a desktop environment or any extra software. We’re going with the 64-bit variant to take full advantage of the pi 4 and superior ARM64 software support.
Base image
Rather than duplicate much of the setup process on each pi, we will configure one pi and then use that as our base image for all the others.
Use lsblk to find your sd card block device on your system. In my case, this was /dev/sde. Double check you have the right reference, or you will end up overwriting another of your drives when copying over the image. The image in this case is compressed with xz, so we decompress and pipe into dd.
xz -dc 2022-04-04-raspios-bullseye-arm64-lite.img.xz | sudo dd of=/dev/sde status=progress
After copying over the image, mount the boot partition. We are doing a headless setup, so we need to make sure wifi and ssh are pre-configured. Additionally, we will set a default password (such as “raspberry”.)
You’ll need a file called wpa_supplicant.conf with your wifi credentials as described here.
# wpa_supplicant.conf

ctrl_interface=DIR=/var/run/wpa_supplicant GROUP=netdev
update_config=1
country=us

network={
    ssid="<insert your ssid>"
    psk="<insert your pass>"
    key_mgmt=WPA-PSK
}
udisksctl mount -b /dev/sde1

# Note the mount location printed by the above command

# enable ssh
touch </path/to/boot>/ssh

# wifi info
cp wpa_supplicant.conf </path/to/boot>/wpa_supplicant.conf

# set default password
echo "pi:$(echo "<desired_password>" | openssl passwd -6 -stdin)" > <path/to/boot>/userconf.txt
If you are using the official pi poe hat, I’d recommend adjusting the fan curve as described by Jeff Geerling. Let’s also disable bluetooth while we’re in here. Append these lines to the end of <path/to/boot/config.txt>
# PoE Hat Fan Speeds
dtparam=poe_fan_temp0=50000
dtparam=poe_fan_temp1=60000
dtparam=poe_fan_temp2=70000
dtparam=poe_fan_temp3=80000

# disable bluetooth
dt-overlay=disable-bt
At this point we can unmount the sd card and boot up our first pi!
udisksctl unmount -b /dev/sde1
Once provided power, your pi should boot up and automatically connect to your wifi. You can check for its IP address from your router’s admin console. SSH in and configure your image! Anything you’d like configured ubiquitously across your pis should be done now. In my case I’m configuring my terminal environment (vim, fonts, tmux, etc.).
ssh pi@<ip-address>
# update software
sudo apt update
sudo apt upgrade -y

# set your locale (en_US.UTF-8) in our case
sudo dpkg-reconfigure locales

# ensure time synced
timedatectl status

## EXTRAS

# install dependencies
sudo apt install -y curl git zsh libncurses-dev xterm zsh tmux python3-pip

# latest vim
git clone https://github.com/vim/vim /tmp/vim
sudo make --directory /tmp/vim && sudo make --directory /tmp/vim install

# my font of choice
git clone --filter=blob:none --sparse https://github.com/ryanoasis/nerd-fonts.git /tmp/nerd-fonts
cd /tmp/nerd-fonts
git sparse-checkout add patched-fonts/JetBrainsMono
./install.sh JetBrainsMono

# ohmyzsh
chsh -s $(which zsh)
sh -c "$(curl -fsSL https://raw.githubusercontent.com/ohmyzsh/ohmyzsh/master/tools/install.sh)" "" --unattended

# All my other dotfiles
sh -c "$(curl -fsLS git.io/chezmoi)" -- init dvignoles/mes-dossiers
~/bin/chezmoi apply ~/.zshrc ~/.aliases ~/.Xresources ~/.bashrc ~/.gitconfig ~/.tmux.conf ~/.tmux.remote.conf ~/.vimrc ~/.zshenv

# github access
ssh-keygen -t ed25519 -C "<youremail@email.com>"
# add key to github account https://docs.github.com/en/authentication/connecting-to-github-with-ssh/adding-a-new-ssh-key-to-your-github-account

touch ~/.ssh/config
chmod 600 ~/.ssh/config
If setting up your github ssh key, add an entry to ~/.ssh/config:
Host github.com
    User git
    IdentityFile ~/.ssh/<pkey_name>.ed25519
Shutdown your pi (sudo shutdown now) and save your configured image. The image will be the size of your sd card. We’ll use pi-shrink to slim it down to a reasonable size and compress with gzip. Copy your image to another sd card to get up and running in your pre-configured environment!
sudo dd if=/dev/sde bs=4M status=progress of=022-04-04-raspios-bullseye-arm64-lite_CONFIGURED.img

sudo pishrink.sh -z 022-04-04-raspios-bullseye-arm64-lite_CONFIGURED.img

# copy over to other sd cards!
 gzip -dc 022-04-04-raspios-bullseye-arm64-lite_CONFIGURED.img.gz | sudo dd of=/dev/sde status=progress
Networking
With all our nodes up and running, it’s time to individually configure their networking.
On each pi:
-
Set up static ips in
/etc/dhcpd.conf.# local cluster networking interface eth0 static ip_address=10.1.2.103/24 # home wifi networking interface wlan0 static ip_address=192.168.50.103/24 static routers=192.168.50.1 static domain_name_servers=192.168.50.1 8.8.8.8 -
Edit
/etc/hostsand/etc/hostname.# /etc/hosts 127.0.1.1 pi101 # exclude the pi you are operating on # 10.1.2.101 pi101 10.1.2.103 pi103 10.1.2.105 pi105 10.1.2.107 pi107# /etc/hostname pi101 -
Setup ssh keys
 ssh-keygen -t rsa -b 4096
 ssh-copy-id pi101
On pi 1 only:
-
Add pi aliases to your
~/.ssh/config# ~/.ssh/config Host pi101 User pi Hostname 10.1.2.101 Host pi103 User pi Hostname 10.1.2.103 Host pi105 User pi Hostname 10.1.2.105 Host pi107 User pi Hostname 10.1.2.107 -
Copy config and authorized keys to all other pis
 scp ~/.ssh/authorized_keys pi10X:~/.ssh/authorized_keys
 scp ~/.ssh/config pi10X:~/.ssh/config
You should now be able to ssh between all pis, try it out to confirm!
ssh pi10x
Kubernetes
Setting up kubernetes with k3s is actually super simple using the provided install scripts. The printout post installation prompted me to edit /boot/cmdline, so look out for that. As we have both ethernet and wifi networking between the pis, we ensure the cluster uses the ethernet networking by specifying the flannel CNI interface. The built in load balaner and ingress controller are disabled because we will be setting up our solution. We also pin the k3s version to be compatibile with the latest rancher release.
# master
 curl -sfL https://get.k3s.io | INSTALL_K3S_EXEC=" --flannel-iface=eth0 --disable servicelb --disable traefik" INSTALL_K3S_VERSION="1.23.9+k3s1" sh -
# get k3s token
sudo cat /var/lib/rancher/k3s/server/node-token

sudo reboot
----
# On worker nodes
# Use static ip
 curl -sfL https://get.k3s.io | INSTALL_K3S_EXEC=" --flannel-iface=eth0" KINSTALL_K3S_VERSION="1.23.9+k3s1" 3S_URL=https://<master-ip>:6443 K3S_TOKEN=<mynodetoken> sh -

sudo reboot
Confirm the internal IPs are as expected.
kubectl get nodes -o wide
NAME    STATUS   ROLES                  AGE   VERSION        INTERNAL-IP   EXTERNAL-IP   OS-IMAGE                         KERNEL-VERSION   CONTAINER-RUNTIME
pi103   Ready    <none>                 26h   v1.23.9+k3s1   10.1.2.103    <none>        Debian GNU/Linux 11 (bullseye)   5.15.32-v8+      containerd://1.5.13-k3s1
pi107   Ready    <none>                 26h   v1.23.9+k3s1   10.1.2.107    <none>        Debian GNU/Linux 11 (bullseye)   5.15.32-v8+      containerd://1.5.13-k3s1
pi105   Ready    <none>                 26h   v1.23.9+k3s1   10.1.2.105    <none>        Debian GNU/Linux 11 (bullseye)   5.15.32-v8+      containerd://1.5.13-k3s1
pi101   Ready    control-plane,master   26h   v1.23.9+k3s1   10.1.2.101    <none>        Debian GNU/Linux 11 (bullseye)   5.15.32-v8+      containerd://1.5.13-k3s1
Next Steps
That’s all for now. We have a working k3s cluster, but what do we want to do with it?